Shift left testing is a software testing approach that emphasizes moving the testing process earlier in the software development life cycle (SDLC). The term “shift left” refers to the notion of shifting the testing activities towards the left side of the project timeline, meaning they are conducted earlier rather than later in the development process.
The goal is to identify and resolve issues more quickly, improve overall software quality, enhance collaboration between team members, and reduce time to market and associated costs.
There are multiple benefits to shifting testing to the left:
Reduced Costs Involved in Development and Testing
Shifting testing to the left helps identify and fix issues earlier in the development process, which typically reduces the costs involved in development and testing. Early bug detection and resolution often require fewer resources and less time, resulting in lower overall expenses. Fixing issues later in the development process can be more complex and time-consuming, increasing the cost of remediation.
Early Bug Detection Ensures Better Code and Product Quality
By performing tests early and frequently, shift left testing enables developers to catch defects and issues as soon as they occur. This early bug detection helps ensure that the code is of higher quality, as issues are resolved before they can compound or cause additional problems. As a result, the final product is more reliable, stable, and less prone to defects, leading to increased customer satisfaction and reduced support and maintenance costs.
Enhanced Test Coverage
When testing is performed later in the development process, time constraints can lead to incomplete or inadequate test coverage. In contrast, shift left testing allows for more comprehensive test coverage, as testing activities are integrated throughout the development process. This expanded coverage helps identify a wider range of issues, from functional defects to performance and security vulnerabilities, further improving the overall quality of the product.
Effective Use of Time and Resources
Shift left testing promotes the efficient use of time and resources by encouraging collaboration between developers, testers, and other stakeholders. Early involvement of testing teams in the development process fosters a shared understanding of requirements and expectations, allowing for more effective planning and execution of testing activities.
Continuous feedback loops and automation help minimize repetitive tasks, allowing team members to focus on more critical aspects of the project. Ultimately, this effective use of time and resources can result in faster development cycles and more efficient use of project resources.
A shift left testing strategy involves integrating testing activities earlier in the SDLC and employing a continuous approach to testing and deployment. Two key components of this strategy are continuous testing and continuous deployment
Continuous testing
Continuous testing involves running automated tests throughout the entire development process to ensure that the software remains in a releasable state at all times. This approach provides immediate feedback on the quality and functionality of the code, allowing developers to quickly identify and address issues.
Continuous testing typically includes the following aspects:
Unit tests: Focus on individual components or functions of the software, ensuring that each part behaves as expected.
Integration tests: Verify that different components of the software work together correctly, identifying any issues that may arise when the components are combined.
System tests: Evaluate the software as a whole, ensuring that it meets overall requirements and behaves correctly in its intended environment.
Performance tests: Measure the software’s response times, throughput, and stability under various workloads, ensuring that it meets performance requirements.
Security tests: Identify potential vulnerabilities and ensure that the software adheres to security best practices.
Continuous deployment
Continuous deployment is the practice of automatically deploying code changes to production as soon as they pass the required tests. This approach allows new features and bug fixes to be released more quickly, reducing the time it takes to deliver value to customers.
Continuous deployment typically involves the following steps:
Code changes are committed to a version control system (e.g., Git).
Automated tests are run against the changes, verifying that they do not introduce any new issues or break existing functionality.
If the tests pass, the code changes are automatically deployed to a staging environment, where further testing and validation can take place.
If the changes pass all tests and validations in the staging environment, they are automatically deployed to production.
Implementing a shift left testing strategy with continuous testing and continuous deployment helps ensure that software is of high quality, stable, and secure. This approach also promotes faster development cycles, more efficient use of resources, and improved collaboration between team members.
Planning the testing life cycle early in the development process is crucial for a successful shift left testing approach. This involves defining the testing scope, objectives, and expected outcomes, as well as identifying the types of tests needed and the tools required to execute them.
Proper planning helps ensure that testing activities are aligned with project goals and that they provide the desired level of coverage and depth. Additionally, planning helps identify potential challenges or constraints and enables teams to allocate resources and time effectively.
2. Specify Quality Standards
Establishing clear quality standards and expectations from the outset is essential for a shift left testing strategy. These standards should be well-defined, measurable, and agreed upon by all stakeholders, including developers, testers, and product owners.
By specifying quality standards early on, teams can better align their testing efforts with project goals and ensure that the final product meets the desired level of quality. Quality standards may include aspects such as performance benchmarks, security requirements, and functional specifications, as well as adherence to coding best practices and industry standards.
3. Offer Continuous Feedback
One of the key benefits of shift left testing is the ability to provide continuous feedback to developers throughout the development process. This feedback is essential for identifying and resolving issues quickly, improving the overall quality of the code and product.
To facilitate continuous feedback, it’s important to create a culture of open communication and collaboration between team members. Encourage developers and testers to work closely together, share insights and knowledge, and address issues as they arise. Regularly review test results and use them to inform development decisions, and leverage tools that enable real-time monitoring and reporting of test progress and outcomes.
4. Embrace Test Automation
Automated tests should be run quickly and frequently, providing immediate feedback on code changes and allowing developers to catch and fix issues early in the development process. Automation also helps reduce the manual effort required for testing, enabling testers to focus on more complex or high-priority tasks.
To make the most of test automation, invest in tools and frameworks that support the project’s specific needs, and prioritize automating tests that are repetitive, time-consuming, or prone to human error. Additionally, ensure that all automated tests are maintainable and scalable, and regularly review and update them to keep pace with evolving requirements and standards.
Application Security Testing with Bright
For a robust AppSec programme, it is important to ensure that security vulnerabilities are detected and remediated early and often. With agile development and CICD, security testing needs to shift left and into the hands of developers.
To succeed, you need to adopt developer friendly tools like Bright’s DAST scanner, built from the ground up to enable developers to own the security testing process, with the following key features:
Developer first – built for DevOps / CICD
Test everything – WebApps and APIs (SOAP, REST, GraphQL)
Accurate – NO false positives
Automation –integrated automatic validation of findings removes manual validation bottlenecks that stifle your release cycles and compound your technical and security debt
Feedback Loop – Easy to use, fast scans and integrates across your pipelines
Easy fixes – Developer friendly remediation guidelines, start fixing security issues early and often
Detect more – automatic Business Logic vulnerability detection
For more information and resources, see our blog and documentation. Better still, request a demo today and start automating your security testing across your pipelines
Choosing the right application security tools can be a daunting task, as there are countless options available in the market. With the rapid advancement of technology, the complexity of these tools has increased, making it even more challenging for individuals and organizations to select the most appropriate solution. The sheer volume of options can be overwhelming, and it can be difficult to determine which tools will meet the specific security needs of an organization. Additionally, many of these tools require a high level of technical expertise to implement and operate effectively. As a result, careful consideration and research are essential to ensure that the right application security tools are selected to protect against potential threats and vulnerabilities.
To help you make the right decision, we have put together a 2023 Guide to Application Security Tools. We understand the importance of selecting the right application security tools, and our guide is designed to simplify the process, making it easier for you to choose the most appropriate solution for your organizational needs.
Recent Hacks
To prepare your organization for possible attacks, it’s essential to comprehend how your adversaries function, what vulnerabilities they target, and what kind of harm they can cause. By answering these and other related questions, you can develop an effective Application Security strategy.
To that end, in the guide we have compiled a list of seven software attacks that have taken place in recent years, complete with an explanation of the attack type, exploited vulnerabilities, and the consequences for the affected organization, so readers can gain a better understanding.
Types of Application Security tools
The guide provides an overview of different types of application security testing techniques, including Static Application Security Testing (SAST), Dynamic Application Security Testing (DAST), Interactive Application Security Testing (IAST), and Runtime Application Self-Protection (RASP).
SAST is a white-box testing technique that can detect vulnerabilities in source code, making it popular for detecting issues early in the development process. DAST, on the other hand, tests the running application from the outside to identify potential security weaknesses. IAST combines both SAST and DAST techniques to analyze an application’s internal flow and link findings to source code. RASP, a complementary solution to SAST and DAST, monitors applications in production to detect and stop malicious behavior. In the 2023 AppSec tools guide you will find a list of popular tools for every testing technique, including features, advantages, and disadvantages for each.
Choosing the right application security (AppSec) testing tool can be a challenging task due to the plethora of options available in the market. To assist organizations in making an informed decision, we delve into the key factors that should be considered when selecting an AppSec tool. Our white paper covers various considerations, such as effectiveness, false positives, ease of use, compatibility, and team empowerment, providing practical guidance to help readers choose the most suitable tool for their specific needs.
Evaluation Criteria
In order to streamline the process of evaluating potential security tools, we have developed a practical checklist that can be used to approach this task in a step-by-step manner. Given the large volume of information that needs to be gathered and digested when considering various security technologies and vendors, this checklist will prove to be an invaluable resource. By utilizing the checklist, you can effectively compare each vendor and technology to ensure that the selection you ultimately make meets all of your requirements. By taking a systematic approach to this process, you can rest assured that you are making an optimal choice that will help to safeguard your organization’s valuable assets.
The Secure Software Development Lifecycle (SDLC) is a crucial framework that enables high-quality software development at a low cost, while also shortening the development time. By integrating security into each phase of the development process, organizations can ensure that by the time code hits production, it’s ready for the market. However, security is often an afterthought in the SDLC, which can result in costly security vulnerabilities that are found and fixed too late.
Regular testing and updates are important to ensure that products are protected from known vulnerabilities that hackers may exploit to compromise devices. Implementing new security measures makes it harder for attackers to successfully compromise devices, which could otherwise result in the theft of sensitive data. Although regular software updates may be inconvenient, they are necessary. As many of us know, humans are often the most vulnerable link in an organization’s cybersecurity chain, which is why cybersecurity training and education is crucial. The importance of cybersecurity training cannot be overstated, as security on the web is constantly evolving, and it is essential to keep employees up to date on the latest cybersecurity trends to ensure both their safety and the security of the company.
The Ultimate Application Security Testing Guide is Here!
Overall, Selecting the right Application Security tools can become overwhelming as the market is flooded with various options. However, we understand the difficulty you may face and strive to make your job easier with our comprehensive guide to AppSec testing. Our guide provides detailed information on recent hacks, different types of application security testing tools, and a list of popular tools along with their pros and cons. We also help you choose the right tools by highlighting the factors to consider and evaluation criteria. In addition, we emphasize the best AppSec practices to ensure that you can confidently make the right decision while purchasing. If you are looking for a simpler purchasing process and want to be sure about your final choice, our guide is the perfect solution for you. Click the link below to gain instant access to the valuable insights and recommendations we have to offer.
Whether you’re starting your Application Security (AppSec) program from scratch or looking to improve an existing one, it’s important to consider various factors such as program maturity, organizational structure, and effective strategies. Unfortunately, there’s no one-size-fits-all solution, as each organization has unique needs and requirements.
Luckily, four industry experts came together for a live discussion on the quest of a perfect Application Security program. They provided insights on best practices, approaches, and tips for addressing common challenges. By the end of the event, participants left equipped with the knowledge and confidence to create, build, and scale a successful AppSec program.
Starting an AppSec Program
When starting an Application Security program, the first step is to gain buy-in from all relevant parties. Without buy-in, the effectiveness of any subsequent activities will be limited. This buy-in must come from the developers, engineering teams, and the entire company at the corporate level. Once buy-in is achieved, a risk framework should be established. After all, identifying risks and performing scans is pointless if there is no one to remediate the issues.
If you are starting your AppSec program from scratch, the framework of people, process, and technology is crucial. It is essential to have a deep understanding of how the organization functions to ensure that the AppSec program’s framework seamlessly integrates with the rest of the organization. If the framework does not fit in well with the organization’s existing processes and fails to make it easy for everyone, then the adoption of the program will be challenging. It is necessary to examine the organization’s current activities and identify the technology assets and gaps to create a comprehensive plan.
Budgeting and Building Blocks
The size of an organization is not necessarily the determining factor for whether it needs an AppSec program. Any organization that is involved in software development, regardless of size, should have an AppSec program to ensure that the applications it produces are secure. It is important to start building the right building blocks for AppSec early and make it a part of the organization’s culture. This can involve starting from the first line of code with easy-to-onboard solutions that are free. Even a small amount of AppSec is better than none.
When it comes to budgeting for an AppSec program, it is important to understand the organization’s specific needs and risks. This will help determine the level of investment required to build and maintain an effective program. This may involve investing in tools, training, and personnel to support the program. It is also important to consider the potential cost savings that can be achieved through early identification and remediation of vulnerabilities. Ultimately, the budget should be based on a realistic assessment of the organization’s needs and risks, and should be adjusted as necessary to ensure that the AppSec program remains effective over time.
Selecting Appropriate Tools
The next step in creating an AppSec program is to consider the tools required for integration. For startups or small companies below 500 employees, open-source tools can be used if the team has the expertise to implement them effectively. However, for larger companies that are scaling, it may be more appropriate to use commercial tools that integrate with existing pipelines, provide reporting capabilities, and make it easier for developers to remediate issues. If there is a limited budget, opting for open-source tools is still better than having no tools at all.
Operating in a scenario where you don’t know what you are protecting can be challenging. When selecting a tool for this purpose, it is important to involve the developers in the proof of concept (POC) phase and seek their feedback. This will ensure that they are happy with the tool and that it does not flood them with false positives. The tool should be precise and should provide proof that developers can trust.
Collaboration and Selection for Successful Implementation
Application Security plays a critical role in bridging the gap between engineers and decision-makers by guiding them towards the right decisions. However, AppSec is vulnerable to losing buy-in from either side of the equation, which can hinder its ability to impact decisions. Therefore, it is important to be mindful of both sides and ensure that decisions are made collaboratively to maintain buy-in and ensure successful AppSec implementation.
In order to effectively implement an Application Security program, it is essential to select tools and solutions that fit into the organization and drive value, taking into account the segment of the market using DevOps and modern development technologies. Deploying the wrong tools can create antagonism between AppSec and development teams, leading to a lack of alignment and collaboration. It is therefore crucial to carefully examine the organization’s current activities and select tools that align with how the organization works to maximize value.
Prioritization: Tools, Business Logic, and Risk Scoring
Prioritization is one of the core problems that organizations face when it comes to Application Security. The approach to choosing and prioritizing activities will depend on the size of the organization. For a small team with someone who is very technical, creating scripts or communicating with a GitHub API may be an option. For larger organizations, it is important to start looking at tools that will provide visibility over all repositories and services, including what is in production and what is not. Understanding which assets are critical and which are external is important in knowing what to give to developers to fix first.
It is also important to look at the company’s mission and understand how important the application is to that mission. This will help determine how important the vulnerabilities are to that particular application. Here, business logic vulnerabilities should also be taken into consideration, as understanding the logic of the application can help identify the actual threat to the application or API.
Risk scoring is another important factor to consider, such as whether the application is public facing or private, whether it contains sensitive data, and whether there are any legal or compliance requirements that apply to it. By considering these factors, organizations can prioritize their application security activities effectively.
Collaboration and Alignment
In order to prioritize effectively, all teams involved in the development and security process must work together seamlessly. It’s important for the AppSec team to operate on the same timeframe and in the same time loops as the development team, and for all teams to consider the business’s overall goals and risk factors. Without proper alignment, there can be a gap between development and AppSec, leading to problems. Empowering people and delegating responsibilities can help to streamline the process and ensure that everyone is working towards the same goals. With a ratio of 500:1 developers to AppSec, it’s important to focus on collaboration and ensuring that everyone is part of the process, rather than trying to take over the project. By working together and aligning cycles, teams can prioritize effectively and achieve successful outcomes.
What Is Dynamic Application Security Testing (DAST)?
What Is Dynamic Application Security Testing (DAST)?
Dynamic Application Security Testing (DAST) is an application security testing methodology in which the application is tested at runtime to discover security vulnerabiltiies. DAST tools don’t have access to the application and API’s source code, so they detect vulnerabilities by performing actual attacks, similar to a real hacker. In a sense, DAST tools perform automated penetration testing of your web applications.
DAST solutions can detect and help protect against web application vulnerabilities, such as the OWASP Top 10. Common flaws include SQL injection, cross site scripting (XSS), external XML entities (XXE), and cross-site request forgery (CSRF). DAST can simulate these attacks and see if the application is vulnerable. While it is possible to scan source code to find vulnerabilities, the most effective method to protect an application is to determine if an external attacker can exploit them at runtime, when the full application is running with all its components.
This is part of an extensive series of guides about cybersecurity.
Simply testing applications during development is insufficient for protecting them from potential breaches during their production stage. It is crucial to establish a diverse application security program to mitigate overall business risk. By utilizing DAST with other strategies, it is possible to detect potential attack vectors and prevent them from being exploited.
DAST solves these challenges and allows your organization to:
Provide accurate vulnerability reports based on the application’s running state
Support developer education by providing actionable fixes to security problems
Easily integrate security testing into the SDLC
Practice DevSecOps more effectively by taking feedback produced from DAST and integrating it into SecOps and DevOps tools
Better protect applications and code
Provide quality vulnerability assessment reports to expedite the remediation process
DAST is an essential component of a comprehensive security testing program, as it provides a real-world evaluation of an application’s security posture. It is typically performed as part of the software development lifecycle to ensure that security issues are identified and addressed before an application is released into production.
DAST Pros and Cons
Benefits of DAST
DAST offers several benefits, including:
Identifying vulnerabilities: DAST tools can identify security vulnerabilities in web applications that could be exploited by attackers. This helps developers and security teams understand how an application may be exploited and take steps to remediate these vulnerabilities.
Real-world testing: DAST tests an application in its operational state, allowing it to identify vulnerabilities that may not be caught by other types of security testing, such as static analysis or manual code review.
Quick testing: DAST tools can quickly scan an application to identify vulnerabilities, allowing security teams to prioritize remediation efforts based on risk severity.
Comprehensive testing: DAST can test the entire application, including its user interface, web services, and back-end components, providing a more comprehensive evaluation of an application’s security posture.
Cost-effective: DAST is a cost-effective way to evaluate the security of web applications, as it does not require access to the application’s source code or specialized security expertise.
Compliance: DAST can help ensure that web applications comply with industry standards and regulations, such as the Payment Card Industry Data Security Standard (PCI DSS) or the General Data Protection Regulation (GDPR).
DAST Limitations
While DAST is a powerful tool, traditional DAST has a few limitations, including:
Limited coverage: Traditional DAST tools only test an application’s external behavior, such as its user interface and web services, and do not assess its internal workings. This limits their ability to identify certain types of vulnerabilities, such as those that occur in the back-end components of an application.
False positives: Traditional DAST tools can generate false positives, which are warnings that a vulnerability exists when it does not. This can result in wasted time and effort, as well as lead to potential security gaps if real vulnerabilities are ignored due to too many false positives.
Limited context: Traditional DAST tools operate without full knowledge of the application’s context, such as business logic or the intended user experience. This can result in a lack of accuracy in identifying vulnerabilities and their potential impact on the application.
Inability to detect all types of vulnerabilities: Traditional DAST tools may not be able to detect all types of vulnerabilities, such as those that require a complex chain of actions to exploit.
Requires significant expertise: Traditional DAST tools require specialized expertise to interpret the results and determine the severity of any identified vulnerabilities. This can be a significant challenge for smaller organizations or those with limited security resources.
DAST tools launch automated scans simulating malicious external attacks on the application. The goal is to identify unexpected outcomes. For example, a test can inject malicious data to uncover injection flaws. A DAST tool typically tests all HTML and HTTP access points. To find vulnerabilities, the test emulates random user behaviors and actions.
A new generation of DAST solutions is emerging, which leverages AI to address the challenges of traditional DAST:
No need for manual tuning – next-generation DAST automatically creates test sets and dynamically identifies the structure of the underlying application.
No false positives – leverages machine learning algorithms and fuzz testing to analyze findings like a human penetration tester, and determine if they are real vulnerabilities or not.
Detects business logic vulnerabilities – accesses web applications like a real user and tries different control flows, until it discovers a user interface path that exposes a security weakness.
Detects zero day vulnerabilities – while traditional DAST can only detect known vulnerabilities from manually updated lists, next generation DAST leverages AI detection capabilities and real time data from other users of the platform to detect zero day attacks.
Advanced reporting – provides reports and compliance audits on par with those created by a human tester.
What is the Role of DAST in Application Security (AppSec)?
Application security testing (AST) tools automate the process of testing, analyzing, and reporting security vulnerabilities. AST tools are an integral part of the DevSecOps movement, which aims to shift security left and add security scans to each stage of the software development lifecycle (SDLC).
AST tools are typically categorized into four main types:
Static application security testing (SAST) – provides white-box testing which analyzes the source code while its components are at rest.
Dynamic application security testing (DAST) – provides black-box tests that models how applications are attacked from the outside.
Interactive application security testing (IAST) – provides instrumentation of the application code. The goal is to detect and report issues during runtime.
Software composition analysis (SCA) – scans the code and analyzes open source software components, looking for vulnerabilities and checking license compliance.
DAST vs. SAST
DAST solutions have unique advantages when protecting web applications:
A downside of SAST solutions is that they have to support the programming language and application framework in use by the application.
In DAST, only issues that represent a real risk are reported. With SAST it can be challenging to determine if a finding represents a real risk or not.
Modern DAST can be used as early as the build phase of the SDLC. You can simulate attacker behavior without lengthy pen-testing. SAST takes place earlier in the SDLC, but can only find issues in the code, not the full application.
DAST detects risks that occur due to complex interplay of modern frameworks, microservices, APIs, etc. SAST solutions are limited to code scanning.
In comparison to SAST, DAST is less likely to report false positives.
Unlike SAST tools, Dynamic analysis tools are language agnostic. They don’t need to have the same programming language or framework as the application you scan.
Dynamic application security testing solutions, like a real hacker, don’t have access to source code. Using them has more real-world benefits.
DAST has been around since the mid-90s, but until recently struggled to find its place in the SDLC.
DevOps brought the change. Today, dynamic analysis tools can be easily integrated with popular issue trackers such as JIRA, GitHub, ServiceNow, and Slack. Like any other type of automated AST solutions, DAST solutions can be integrated with CI platforms such as Jenkins, CircleCI, TravisCI, JFrog Pipelines or Azure DevOps.
Organizations want to implement application security testing into the SDLC because the sooner a security issue is detected, the cheaper it is to fix.
DAST Best Practices
Enable Effective Collaboration with DevOps
DAST tools can help not only discover and prioritize vulnerabilities, but also effectively hand them over to DevOps teams to ensure they are addressed correctly. To facilitate this, integrate the DAST tool with ticketing and bug tracking systems used by the DevOps team. Create tickets or issues with the precise information developers need to quickly fix vulnerabilities. This will help them prioritize security issues, and promote a DevSecOps mindset in your organization.
Adopt Defensive Coding Practices
DAST is more effective when the underlying application is built with security in mind. Defensive programming encourages developers to consider how attackers might exploit vulnerabilities and misconfigurations and then design preventive measures into the application while building it.
Developers do not need formal security training to write secure code. It only requires some basic precautions to ensure that the code they write does not contain commonly exploited misconfigurations and vulnerabilities.
Use DAST as Early in the SDLC as Possible
The earlier you integrate DAST into SDLC, the higher your returns will be. In general, early testing is ideal because it can detect vulnerabilities before they hit production, for remediation to be carried out earlier, making the fixes easier and cheaper.
Integrate DAST with Your CI/CD Pipeline
You can run DAST at every stage of the CI/CD pipeline – early development, testing, staging, and production deployment. At every stage, DAST solutions will provide useful recommendations and reveal vulnerabilities. Identifying these vulnerabilities and fixing them immediately as they are introduced to the pipeline, can dramatically improve security and save time.
Bright’s Next-Gen DAST Solution
Unlike other DAST solutions, Bright was built from the ground up with developers in mind. It lets developers automatically test their applications and APIs for vulnerabilities with every build.
Bright tests every aspect of your apps. It enables you to scan any target, including web applications, internal applications, APIs (REST/SOAP/GraphQL), and serverside mobile applications. It seamlessly integrates with the tools and workflows you already use, automatically triggering scans on every commit, pull request or build with unit testing. Scans are blazing fast, enabling Bright to work in a high velocity development environment.
Instead of just crawling applications and guessing, Bright interacts intelligently with applications and APIs. Our AI-powered engine understands application architecture and generates sophisticated and targeted attacks. By first verifying and exploiting the findings, we make sure we don’t report any false positives.
See Additional Guides on Key Cybersecurity Topics
Together with our content partners, we have authored in-depth guides on several other topics that can also be useful as you explore the world of cybersecurity.
DAST stands for Dynamic Application Security Testing. It is a method of testing the security of a web application by executing it and analyzing its behavior while it’s running. Unlike SAST (Static Application Security Testing), which analyzes the source code without executing it, DAST focuses on the application’s runtime environment and how it interacts with the underlying infrastructure, such as the web server, database, and other components. DAST tools typically simulate attacks against the application by sending requests to the application and examining its responses. This can include injecting malicious data into form fields, attempting to access restricted areas of the application, and other actions that an attacker might take.
IAST stands for Interactive Application Security Testing. It is a method of testing the security of a web application that combines elements of both SAST and DAST. Like SAST, IAST analyzes the source code of an application, but it also executes the code and monitors its behavior in real-time. The goal of IAST is to provide a more comprehensive view of the application’s security posture than either SAST or DAST alone. IAST tools typically instrument the application’s code to provide visibility into its behavior, including the data that is being processed and the interactions between components. This information is used to identify security vulnerabilities and provide detailed information about the nature and severity of the issues.
The basic idea behind DAST is to send HTTP requests to the application and analyze the responses, looking for indications of security issues such as SQL injection, cross-site scripting (XSS), broken authentication and authorization, and other common web application attacks. DAST tools typically automate this process, sending a large number of requests to the application and analyzing the results to identify potential vulnerabilities.
DAST tools can be used to scan entire web applications or specific parts of an application, such as a particular URL or form. They can be run on a schedule, or triggered manually as part of a security testing process.
How IAST Works
In IAST, security testing is performed while the application is running, similar to DAST. However, instead of simply sending requests to the application and analyzing the responses, IAST instruments the application’s code to monitor its behavior in real-time. This allows IAST to provide more detailed and accurate information about potential security vulnerabilities, as it has access to information about the application’s internal state.
The IAST process works as follows:
The IAST tool is integrated into the application, usually by adding a special library or agent to the application’s code.
The IAST tool monitors the application’s behavior as it runs, tracking information such as the input and output of each function, the values of variables, and the flow of control through the code.
When a potential security vulnerability is detected, the IAST tool raises an alert, providing information about the nature of the issue and the location in the code where it was found.
IAST vs DAST: What Are the Differences?
IAST and DAST are both methods of testing the security of web applications. However, there are some key differences between the two:
Approach
IAST is a hybrid approach that combines both dynamic and static analysis methods. It analyzes the behavior of the application at runtime and also performs a static analysis of the source code. This provides a more comprehensive approach to security testing as it takes into account both the runtime environment and the source code. On the other hand, DAST is a dynamic testing approach that only analyzes the behavior of the application while it is running.
Testing Method
IAST tests the application while it is running, providing real-time analysis of the security vulnerabilities. It monitors the application’s behavior and provides continuous feedback on the security issues it discovers. DAST tests the application by sending various inputs to it and observing how it responds. This approach simulates real-world attacks and identifies vulnerabilities that exist in the application.
Information Gathering
IAST provides more detailed information about security vulnerabilities as it has access to both the source code and the runtime environment. This allows IAST to identify vulnerabilities that are not easily detected through dynamic testing alone. DAST, on the other hand, provides limited information about vulnerabilities as it only has access to the runtime environment.
Performance
IAST may impact the performance of the application being tested, as it runs in real-time and analyzes the application’s behavior. DAST, on the other hand, does not impact the performance of the application, as it only sends inputs to the application and observes how it responds.
Ease of Use
DAST is easier to set up and use, as it requires fewer resources and expertise. It is a good option for organizations that do not have a dedicated security team or the resources to set up and use IAST. On the other hand, IAST requires more resources and expertise to set up and use effectively, as it combines both dynamic and static analysis methods.
In conclusion, both IAST and DAST have their own advantages and disadvantages, and the choice between them will depend on the specific needs and requirements of the organization. A combination of both IAST and DAST can provide a more comprehensive approach to web application security testing. Organizations should consider their security needs, resources, and expertise when deciding which method to use.
Unlike other DAST solutions, Bright Security was built from the ground up with developers in mind. It lets developers automatically test their applications and APIs for vulnerabilities with every build.
Bright Security tests every aspect of your apps. It enables you to scan any target, including web applications, internal applications, APIs (REST/SOAP/GraphQL), and server side mobile applications. It seamlessly integrates with the tools and workflows you already use, automatically triggering scans on every commit, pull request or build with unit testing. Scans are blazing fast, enabling Bright to work in a high velocity development environment.
Instead of just crawling applications and guessing, Bright interacts intelligently with applications and APIs. Our AI-powered engine understands application architecture and generates sophisticated and targeted attacks. By first verifying and exploiting the findings, we make sure we don’t report any false positives.
The term “application security” (AppSec) describes the processes, practices, and tools used to identify, repair, and protect against application vulnerabilities throughout the Software Development Life Cycle (SDLC). AppSec activities include, but are not limited to, performing a formal secure code review, hiring a pentester, or simply updating an existing framework with the final goal of improving existing security practices.
Why Application Security Matters
Application security activities and practices are beneficial to ensure the security of your applications by proactively identifying and remediating vulnerabilities. With the threat landscape continuously evolving, attackers are finding new ways to gain access to mission-critical data. When an organization undergoes an attack, the resulting data breach causes financial damage from remediation, data loss, downtime and customer attrition, as well as reputational damage in terms of customers losing trust and confidence in the brand and eroding brand image. When it comes to the security of organizational assets, being proactive is better than reactive. By identifying security flaws, vulnerabilities, and misconfigurations and fixing them before an attacker finds them, organizations save both time and money.
In recent years, application security has become increasingly critical as notable security breaches put the field into the spotlight. According to a recent study conducted by Check Point, global cyber attacks increased by 38% in 2022 compared to 2021. This steep incline reiterates the need for increased enterprise interest and effort to strengthen overall security posture. To achieve this, companies are increasing their investments in AppSec, with overall spending predicted to hit $7.503B in 2023, a 24.7% increase from the previous year.
Top 5 Application Security Trends in 2023
AppSec and CloudSec will converge
Tighter open-source security
Attack surface will continue to expand
Demand for vulnerability prioritization
Extreme “Shift Left”
AppSec and CloudSec will converge
Cloud security involves a collection of security measures designed to protect cloud-based infrastructure, applications, and data. These measures help to ensure user and device authentication, data and resource access control, and data privacy protection. Historically, AppSec and CloudSec functioned as independent security functions. However, to properly determine attack surface and overall security posture, both application code vulnerabilities and misconfigurations of the cloud service hosting must be examined. By converging AppSec and CloudSec, organizations can benefit from better context and remediation. Understanding the attack surface cohesively by looking at how the application code interacts with the cloud service provider, business-critical vulnerabilities can be identified, allowing for task prioritization. Mainly, this is due to determining the root cause of the vulnerability, which in turn, will allow for increased efficiency and effectiveness.
Tighter Open-Source Security
An expanding cyber attack surface leads the open-source ecosystem to be under constant risk of an attack. Countless data breaches have left hackers at an advantage and open-source libraries vulnerable to manipulation from typo-squatting, hidden code insertions, and other attack techniques. However, 2023 will likely bring about new initiatives to introduce additional controls for open-source security. For instance, we will experience an increased demand for open-source validation, including authenticity checks, reputation checks, and regular vulnerability scanning. Open-source repositories will demand higher standards on uploaded software for increased security. Lastly, 3rd parties will include a Software Bill of Materials (SBOM), which can be used for validation before consumption.
Attack Surface Will Continue to Expand
Technological improvements have resulted in the cybersecurity attack surface to expand for many years. Unfortunately, this trend is unlikely to slow down in 2023. The Covid-19 pandemic streamlined the growing trend of a distributed workforce. While there are many advantages of a distributed workforce, including having access to a much larger talent pool, without proper measures in place, this becomes a double-edged sword. Having multiple systems and plugins, the utilization of numerous access keys, tokens, machine accounts, and automation could leave an organization vulnerable. Those not baking security into every aspect of their organizational layout leave room for attacks resulting in data manipulation, loss and/or theft.
Demand for Vulnerability Prioritization
Vulnerability management typically involves sorting through copious amounts of noise to determine what needs remediation and what doesn’t in order to prioritize remediation efforts. Of course, false positives negatively impact efficiency as the mountain of noise grows to what may seem unbearable. In 2023, there will be increased pressure on vendors to provide tools with minimal false positives and help prioritize efforts by providing actionable data on relative risk. No one wants to be left guessing whether a vulnerability is exploitable or waste countless hours getting to the root cause of a vulnerability without knowing the severity of the threat. For instance, is the vulnerability exploitable? Where is the code running? Is this business-critical?
Extreme “Shift Left”
The philosophy of shifting left refers to introducing security as early as possible in the Software Development Life Cycle. Historically, organizations would wait to introduce security until the final stages of the SDLC, and by this point, it is too late, resulting in security vulnerabilities present in production. As DevOps continues to grow in popularity, security has been unable to keep up with this newfound speed. Here, the only solution is to Shift Left and ease the burden on AppSec teams. Indeed, the only way to make informed security decisions and ensure good security posture is to catch vulnerabilities early on. In 2023, more companies will adopt this philosophy and begin reaping the benefits.
The Year of AppSec
Application Security matters now more than ever. With a growing attack surface and increased threats, organizations must be diligent in adopting best practices to ensure the security of their applications. Luckily, this has not gone unnoticed. As spending increases, organizations will become more knowledgeable and equipped to protect themselves by shifting left, tightening controls, and having a clear definition of remediation to avoid becoming the next big headline on data breaches.
Is your organization looking to integrate security as early as unit testing? Get ahead of vulnerabilities and save both time and money by adopting an AppSec program that fits your company’s needs. Don’t know where to start? We are here to help! Our Dev-Centric, enterprise Dynamic Application Security Testing tool will enable your organization to secure your applications and APIs at the speed of DevOps. AppSec is now; don’t get left behind.
Cypress is an open source end-to-end testing framework that can help you unify web application testing. It works for all programming languages, platforms, and browsers. You can use Cypress for unit and integration testing. All tests are written in JavaScript and run in real browsers.
Cypress provides an integrated development environment (IDE) that you can load in your browser. The framework employs an event-based architecture that connects with Google Chrome’s lifecycle events. It enables Chrome to wait for Ajax requests to complete without using a timeout or polling mechanism, leading to faster and more reliable tests.
Cypress provides a CLI that you can use to test websites on various devices and browsers. The framework lets you use familiar debugging tools with Chrome and also install additional tools such as Redux Dev Tools and React Dev Tools. The goal is to enable you to run tests using the same stack you use for development.
Standard testing frameworks (e.g., Selenium) usually run outside the web browser to execute commands remotely across the network. The Cypress testing framework does the opposite – it runs in the same loop as the tested application.
A Node server process supports Cypress with constant communication and synchronization. The Node process and Cypress execute tasks for each other. Accessing the front and back end allows you to respond quickly to an application’s events. You can simultaneously perform high-privilege tasks outside the browser.
Cypress works at the network layer, reading and modifying web traffic as it flows. Therefore, Cypress can modify all incoming and outgoing browser traffic and change any code that might disrupt its capabilities, such as automating the browser.
Cypress maintains control over the entire test automation process. It has a unique ability to understand events both within and outside the browser. Cypress can thus deliver consistent results – more so than other testing tools.
You install Cypress locally on a physical machine, allowing it to access the operating system to automate tasks. This setup enables Cypress to perform tasks like recording video content, taking snapshots, and executing network and file system operations.
Cypress works within an application, providing native access to all components, including application instances, functions, timers, windows, documents, DOM elements, and service workers. You can access everything in a Cypress test. Cypress does not serialize objects or use an over-the-wire protocol to limit access. The test code has the same access as the application code.
Choosing the type of test is one of the first considerations when building a testing suite. Cypress supports component and end-to-end tests. Each testing type has specific considerations and benefits depending on the test’s objectives. Usually, the application testing suite will contain both test types.
End-to-End Tests
This technique fully tests applications from the back end to the web browser, covering third-party integrations. An end-to-end test aims to check how an application works as a whole. Cypress executes end-to-end testing using the same means users interact with an application, ensuring the test reflects the user experience.
Developers, test engineers, and other team members can write these tests in Cypress using an API to simulate a real user’s behavior. End-to-end testing requires more complicated setup and maintenance than component testing.
Component Tests
Some development frameworks allow teams to break applications into components that team members write and test individually. Components are logical units ranging from small buttons to complex forms. They are easy to test because they are mountable, enabling testers to work with them separately from the rest of the application.
A component test focuses on a specific component’s functionality. Usually, developers write component tests when they build components – the test code resides with the component’s code. However, component testing does not accurately represent a component’s real-world performance – it doesn’t cover how the component interacts with other components or how the application functions overall.
Quick Tutorial: Cypress Unit Testing Example
Here is a guide for creating Cypress component tests for React applications. Several frameworks are available to build React projects automatically (i.e., Vite, Create React App) – the following example uses Vite.
Use the following steps to create a project with Vite:
1. Use the scaffold command to create a project with the React template.
2. In the directory, run the npm install command.
3. Specify Cypress and launch the project.
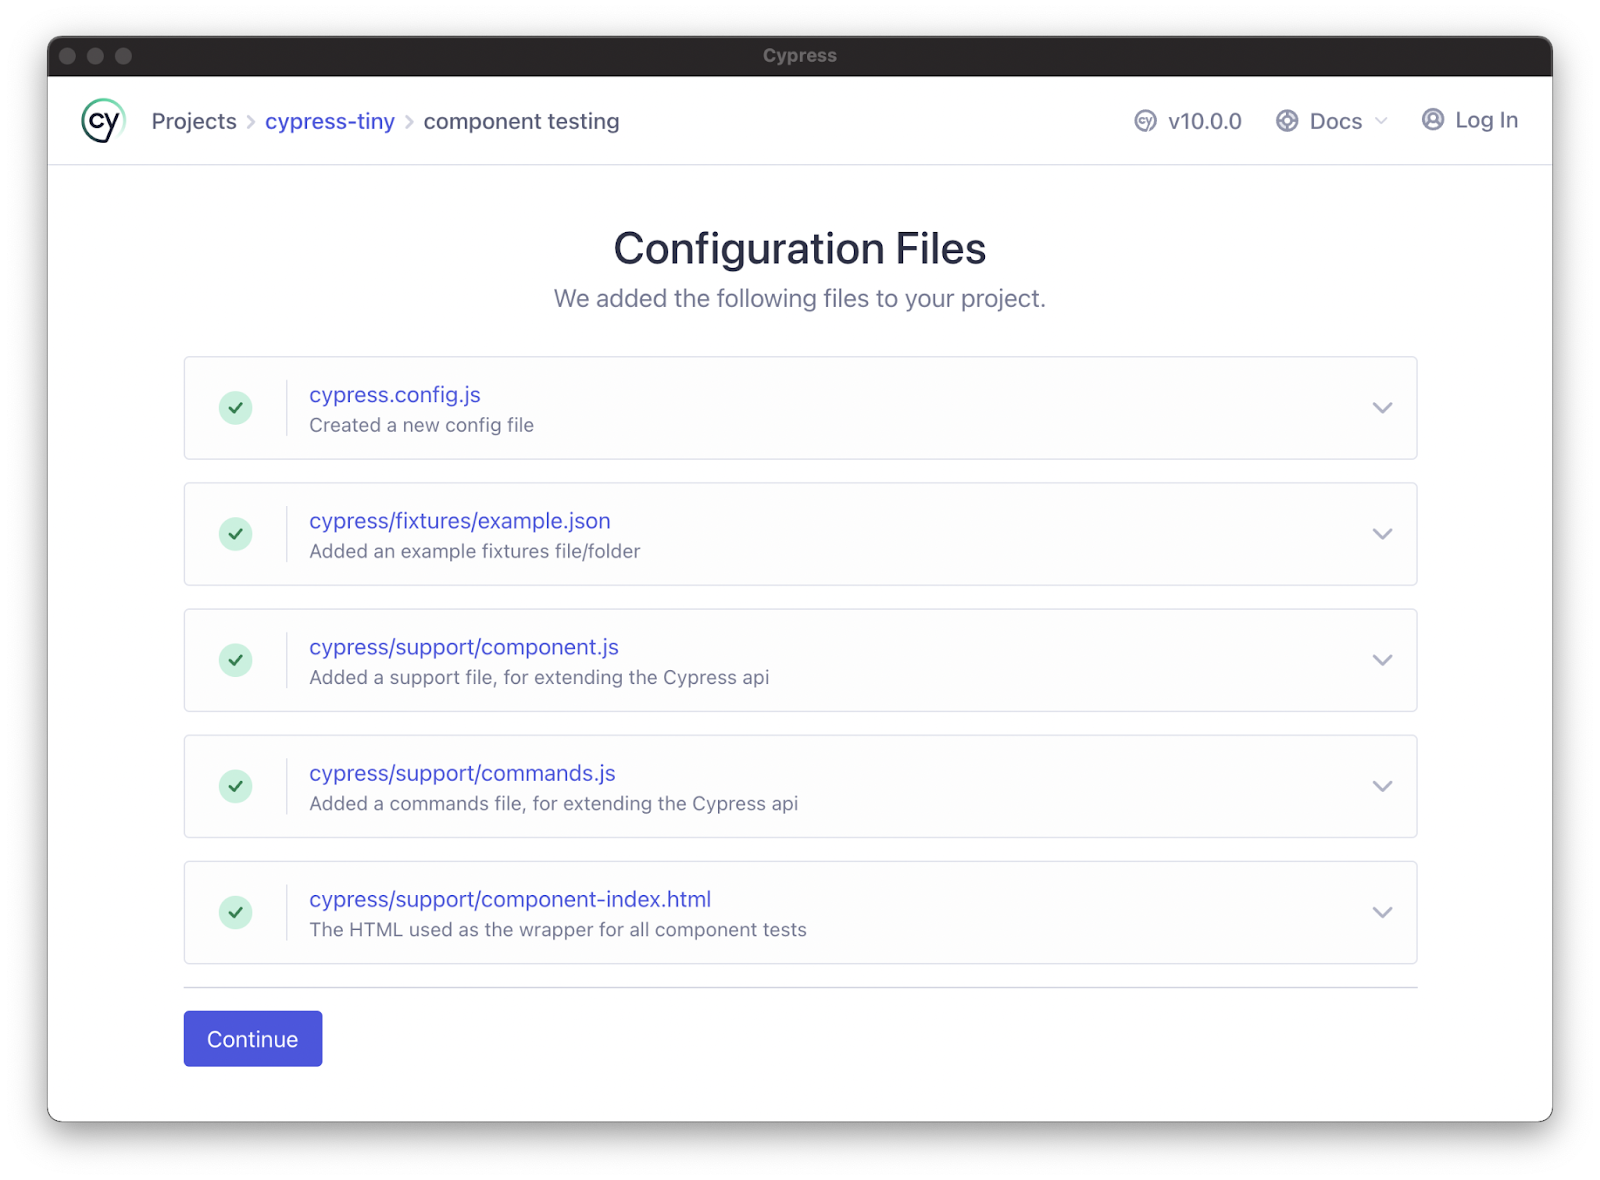
Configure the Component Test
When Cypress runs for the first time for a given project, it prompts the user to set up end-to-end or component testing. Select the component testing option and continue through the wizard. The Cypress launchpad detects the framework and generates the required configuration information.
Once you’ve set up component testing, select and launch the preferred browser to open Cypress.
Create a Component
Next, you’ll need components to test – you can start with a simple component with few dependencies. For an example of a simple React component, use a button without dependencies. Import the component from React.
Mount the Components
Most tests use a similar format regardless of the framework. To test a component, arrange the test by mounting your chosen component. You can import a mount function for every supported framework from the Cypress package:
import { mount } from 'cypress/react'
Mount the imported component:
import { mount } from 'cypress/react'
import Button from './Button'
describe('
You can add the mount function as a custom command to make it easier to use for all the component tests (the launchpad wizard normally configures this automatically).
The component support file might look like this:
// cypress/support/component.js
import { mount } from 'cypress/react'
Cypress.Commands.add('mount', mount)
Next, remove the mount import to update the button component – use the cy.mount command. Create a project spec (Button.spec.jsx) and apply this script:
import Button from './Button'
describe('
The test should now work. Open Cypress in your chosen browser and select Button.cy.jsx from your spec list. You should see the mounted button component in the test environment. If the test works in Cypress, it should also work in the real world because the test uses a real web browser.
Security Unit Testing with Bright Security
Bright is a developer-first Dynamic Application Security Testing (DAST) scanner, the first of its kind to integrate into unit testing, revolutionizing the ability to shift security testing even further left. You can now start to test every component / function at the speed of unit tests, baking security testing across development and CI/CD pipelines to minimize security and technical debt, by scanning early and often, spearheaded by developers. With NO false positives, start trusting your scanner when testing your applications and APIs (REST, GraphQL), built for modern technologies and architectures.
Unit Testing in Node.js: The Basics and a Quick Tutorial
Node.js is a popular JavaScript library based on Chrome’s V8 JavaScript engine. It is used to develop server-side components of web applications.
Unit testing is a software testing method that tests individual units/components individually. A unit can be described as the smallest piece of code that can be tested in an application. Unit tests are typically performed by developers during the application development phase.
To do unit testing in Node.js, you will typically use a JavaScript unit testing framework. Common frameworks include Mocha, Jest, Jasmine, and Cypress. We’ll show how to do Node.js unit testing in Jest.
In Node.js, like in other programming languages, unit tests can help you ensure that your program works as expected, identify bugs early in the development process, and improve the stability of your software. Good testing ensures your program meets user requirements and maintains high code quality as development progresses.
A major benefit of unit tests is that they can help you catch regressions. A regression is a new change to the codebase that causes problems with pre-existing code or functionality. Without unit tests, to catch regressions you would have to comprehensively test the entire application every time it changes, which is very difficult to do. A comprehensive set of unit tests, run automatically every time your codebase changes, is highly effective at catching regressions.
How to Choose a Node.js Testing Framework
There are many JavaScript testing frameworks. Here are a few things you should look when evaluating a Node.js testing framework for your project:
Setup time—the framework should require minimal effort to get your tests up and running.
Support—the framework should have comprehensive documentation and an active community to support you if there are issues.
Feature set—ensure the framework has advanced unit testing features such as mocking/stubbing, matchers (functions that test the relation between objects), and spiers (which gather execution information unavailable to the test code).
Performance—unit tests need to run fast, otherwise they will interrupt your development process and reduce productivity. Ensure your framework can run your unit tests quickly.
Reporting—the framework should have reporting of test coverage and execution results. If your organization needs customized reporting, check if the framework provides it.
Integration—test libraries should be easy to integrate into your continuous integration (CI) process. Preferably, your CI system should support the framework out of the box.
Jest is a popular framework for unit-testing Node.js applications. It’s popular for its testing functionality that uses parallelism techniques for improved performance. Additionally, it gives an output that shows the piece of code causing failed tests.
Jest requires no configuration except for its installation. Once installed, you can start writing tests and testing your Node.js applications immediately.
Creating a Demo Node.js Application
To create a demo Node.js application for testing:
Use the following commands to create and start a directory for a demo Node.js application.
mkdir string-multiplier
cd string-multiplier
npm -y
Add the following code to a file called index.js in the root folder.
const port = 3000
const host = '127.0.0.1'
demo_server.listen(port, host
console.log(`Listening at http://${host}:${port}`)
This Node.js application will display a form and ask for numbers as input. Next, it will forward the input string it receives to the multiplication function. The application displays the product of comma-separated numbers when the user presses Multiply. Run the following command and go to the address it returns as output to see the HTML page working.
node index.js
This tutorial will test a simple multiplication function. Create a file called multiplication.js and add the function shown below.
function multiply(numbers) {
    return numbers
        .split(',')
        .map(x => parseInt(x))
        .reduce((a, b) => a * b)
}
exports.multiply = multiply;
Create a package.json file for this Node.js application and add the following specifications.
Navigate to the root directory of your project through the terminal.
Install Jest by running the following command. The --save-dev flag installs all the needed dependencies and the framework itself.
npm install jest --save-dev
Go to the package.json file also present in the root directory. Replace the line with "test:" with the following code.
"test": "jest"
Now, npm will run the Jest unit tests whenever you want to test your Node.js application.
Writing and Running Tests for Node.js Application
To create unit tests for a Node.js application:
Create a separate file for your tests in the project’s folder. A unit test for the multiplication function from the demo Node.js application looks like as shown below. This code is in a file called multiplication.test.js.
const multiplication = require('./multiplication)
test('string with a single number should result in the number itself', () => {
    expect(multiplication.multiply('1')).toBe(1);
  });
test('string with two numbers should result in the product of the numbers', () => {
    expect(multiplication.multiply('5,5')).toBe(25);
  });
This code is in a file called multiplication.test.js. Here, the code first imports the module it will test. Then, it describes the test by providing a helpful string. Finally, it specifies what inputs to pass and the expected outcome that will determine a successful or failed test.
Navigate to the terminal and use any of the two following commands to run the test:
Bright is a developer-first Dynamic Application Security Testing (DAST) scanner, the first of its kind to integrate into unit testing, letting you shift security testing even further left.
You can now start to test every component / function at the speed of unit tests, baking security testing across development and CI/CD pipelines to minimize security and technical debt, by scanning early and often, spearheaded by developers.
With NO false positives, start trusting your scanner when testing your applications and APIs (SOAP, REST, GraphQL), built for modern technologies and architectures. Sign up now for a free account or read our docs to learn more.
What Is the Open Web Application Security Project (OWASP)?
The Open Web Application Security Project (OWASP) is a non-profit foundation by a global community dedicated to providing free application security resources. OWASP offers guidance on developing and maintaining secure software applications. The goal is to educate software architects, developers, and business owners about security risks.
OWASP supports open source as well commercial security products. Its website offers a place for security experts and IT professionals to learn about application security and get actionable advice for securing their applications.
OWASP publishes the widely known Top 10 Web Application Security Risks, which is updated every few years as new risks emerge and listed risks change. The list includes the most dangerous web application security risks and offers recommendations for mitigating them. OWASP also has two similar lists for APIs and mobile applications.
OWASP strives to educate all stakeholders involved in the software development lifecycle, including architects, developers, designers, managers, and business owners. The goal is to inform stakeholders about the importance of web security and the consequences of poor security practices.
Security knowledge base
OWASP offers an online wiki supported by almost two decades of research and backed by leading security experts. OWASP’s ethical hackers gathered vulnerabilities from thousands of applications and hundreds of organizations. They leverage the information to share knowledge of vulnerabilities, threats, and key strategies for implementing countermeasures.
Examples of risks and attacks
OWASP provides code examples and sample applications intentionally riddled with security flaws to help developers train to avoid known pitfalls. The community-backed resources can help organizations mitigate risk, conduct threat modeling, and perform architectural threat analysis.
OWASP compliance
Software development teams can adopt OWASP compliance as part of the software development lifecycle and use the information to create risk management policies that improve credibility. OWASP offers code review guides and frameworks that provide documentation for penetration testing best practices, helping teams measure risk relative to specific environments.
Conforming to OWASP standards and making development more security-conscious helps teams and organizations better mitigate vulnerabilities and improve the overall quality of applications.
Related content: Read our guide to OWASP certification (coming soon)
Key OWASP Projects
The OWASP foundation helps aspiring open source projects improve software security. The foundation is a well-known and credible entity within the security community, offering funding and project summits for qualifying programs. The community holds conferences and local chapters that connect projects with users.
OWASP projects are open source and built by the community of volunteers. Project leaders are in charge of defining their project’s roadmap, vision and tasks, promoting the project, and building the team. OWASP currently supports over 100 active projects, with new applications submitted weekly.
OWASP projects give members the opportunity to test ideas and theories while getting professional advice and support from the OWASP community. Each project has a web page, Slack Channel, and mailing list. Most projects also maintain their content in OWASP’s GitHub organization.
OWASP Top 10 Series
The OWASP Top 10 list explains the most critical web application vulnerabilities. Data analysts determine eight of these threats, and an industry survey helps decide the last two threats. When it was first created, the list was perceived as an awareness document.
However, the list is now considered an industry standard for training, testing, and development. It is also referenced in several compliance regulations, including The Payment Card Industry Data Security Standard (PCI DSS).
The importance of the OWASP Top 10 list
A web application vulnerability is a security weakness in software designed to run on a web browser. The ability to run on web browsers makes applications highly accessible but also makes them a target for attackers.
Web applications can include many security vulnerabilities—there are hundreds of application security vulnerabilities, including misconfigurations and flawed code. It is inadvisable to think a web application does not have a vulnerability of some kind.
The OWASP top 10 list provides organizations and development teams with a way to prioritize mitigation. Once these vulnerabilities are detected, organizations can immediately work on remediating these issues before, during, and after development.
OWASP Cheat Sheet Series
The OWASP Cheat Sheet Series provides a set of simple guides for application developers and security defenders. Instead of focusing on detailed yet impractical best practices, these guides offer good practices that most developers can implement.
Related content: Read our guide to OWASP cheat sheets (coming soon)
OWASP ZAP
Zed Attack Proxy (ZAP) is an OWASP open source penetration testing tool. It is flexible and extensible, designed especially to help test web applications. ZAP works as a Man-in-the-Middle (MitM) proxy, standing between a tester’s browser and the tested web application.
OWASP ZAP can intercept and inspect the messages sent between the browser and tested web application, modify these contents when needed, and forward the packets to the destination. You can use it as a standalone application or as a daemon process.
Related content: Learn more in our detailed guide to OWASP ZAP (coming soon)
OWASP Dependency-Check
Dependency-Check is OWASP’s software composition analysis (SCA) tool. It attempts to identify publicly disclosed vulnerabilities within your project’s dependencies. It tries to determine if a common platform enumeration (CPE) identifier exists for each dependency. If OWASP Dependency-Check finds a CPE identifier, it generates a report that links to all relevant CVE entries.
Related content: Learn more in our detailed guide to OWASP Dependency Check (coming soon)
OWASP Juice Shop
OWASP Juice Shop is a web application made intentionally vulnerable for security training purposes. It is written in JavaScript and filled with many hacking challenges of varying difficulty levels created for user exploitation. It helps users start learning about web application security.
You can use OWASP Juice Shop for security training, Capture the Flag (CTFs), as a guinea pig for security tools, and awareness demos. It encompasses vulnerabilities from the OWASP Top 10 list as well as many other security flaws from real-world applications.
eb application security.
Related content: Learn more in our detailed guide to OWASP Juice Shop (coming soon)
OWASP SAMM
The Software Assurance Maturity Model (SAMM) is a software security compliance model developed by OWASP and sponsored by industry organizations. OWASP SAMM aims to provide a measurable and effective way to analyze and improve the software security posture of organizations of all types and sizes.
This self-assessment model can help raise awareness and inform organizations on how to securely design, develop, and deploy software. Organizations that implement and strictly adhere to the model can increase their confidence, knowing they are prepared to handle source code threats.
Related content: Learn more in our detailed guide to OWASP SAMM (coming soon)
OWASP Top 10 Web Application Security Risks
Below we present a brief overview of the top 10 risks and how to prevent them.
Learn more about these risks in our detailed guide to the OWASP Top 10.
Broken Access Controls
All sensitive information must be available to a limited set of users based on their access permissions. Broken access controls allow unauthorized users to access data without the required permissions.
To ensure proper access controls:
Establish a secure application development lifecycle with strong security and privacy controls.
Leverage secure designs and pre-built components.
Implement threat modeling.
Embed security controls in user stories.
Apply plausibility checks across the application.
Keep the application tiers separate.
Cryptography Failures
Cryptographic vulnerabilities result from improper encryption and decryption methods, including using obsolete ciphers and misapplying protocols.
To ensure strong cryptography to protect data:
Disable autocomplete and caching on data collection forms.
Minimize the data surface.
Encrypt data at rest and in transit.
Implement up-to-date encryption.
Use adaptive hashing functions to save passwords.
Injection Vulnerabilities
Attackers exploit these vulnerabilities to inject malicious commands into applications. SQL injection is the most common injection attack. To mitigate injection attacks:
Authenticate all data from untrusted sources, including end-users.
Separate data and commands to prevent applications from executing supplied data as commands.
Use parameterized SQL queries.
Use a secure API instead of an interpreter.
Use intrusion detection and server-side validation to identify suspicious behavior.
Design Flaws
Design flaws affect insecure applications that lack threat modeling and secure design practices. Insecure design often fails to profile business risks and determine the required security level.
To ensure secure design:
Establish a secure application development lifecycle with strong security and privacy controls.
Leverage secure designs and pre-built components.
Implement threat modeling.
Embed security controls in user stories.
Apply plausibility checks across the application.
Keep the application tiers separate.
Security Misconfigurations
Issues with an application’s security configurations can enable attacks. For instance, applications that don’t filter packets properly may allow attackers to use default credentials.
To prevent security misconfigurations:
Implement repeatable hardening processes with identical configurations across all environments.
Avoid incorporating unnecessary features or components and delete unused objects.
Incorporate configuration reviews and updates into the patch management process.
Segment the application’s architecture to contain threats.
Automate verification processes to evaluate configurations.
Outdated and Vulnerable Components
Unsupported and out-of-date software and components with known vulnerabilities allow attackers to compromise applications.
To keep applications free of vulnerable components:
Regularly test and scan components for vulnerabilities.
Maintain inventory of all components and dependencies.
Eliminate redundant components, features, and dependencies.
Only use components from trusted sources (i.e., signed packages).
Monitor components and libraries to identify unmaintained and unpatched objects.
Authentication Issues
Authentication vulnerabilities include weak identification and authentication measures, allowing attackers to stuff credentials or break through with brute force.
To prevent authentication vulnerabilities:
Use multi-factor authentication.
Close expired and inactive sessions.
Use robust passwords and avoid default credentials.
Monitor all login attempts.
Leverage a session manager to secure user sessions.
Integrity Vulnerabilities
Maintaining data and software integrity is essential for securing applications. Failure to verify integrity can result in exploits. One such vulnerability is insecure deserialization, where the application fails to deserialize vulnerable external objects, allowing attackers to manipulate the data received at the back end.
To ensure integrity:
Verify the source of data and software using digital signatures.
Ensure dependencies and libraries only consume trusted repositories.
Review configuration and code changes to prevent malicious configurations and code from reaching the software pipeline.
Segregate and securely configure the CI/CD pipeline.
Security Monitoring and Logging Failures
These failures include detection and response errors. Monitoring and logging are essential for detecting breaches, ensuring visibility, and allowing security and IT teams to respond.
To ensure proper monitoring and logging:
Log all validation failures with the relevant context information for forensic analysis.
Use an easy-to-consume log format.
Encode all log data correctly to mitigate injection attacks.
Keep audit trails for all high-value transactions.
SSRF Vulnerabilities
Server-side request forgery (SSRF) is a security vulnerability allowing attackers to induce server-side applications to send malicious HTTP requests to a chosen domain. It arises when applications don’t validate user-supplied data. Attackers often use SSRF to bypass firewalls and other access controls.
To prevent SSRF:
Segment the functionality of sensitive resources to minimize the impact of SSRF attacks.
Use policies that deny access by default or block non-essential traffic.
Sanitize and validate user-supplied data.
Use allow lists to restrict access.
Avoid sending raw responses to the client.
Disable HTTP redirection.
OWASP Top 10 API Security Threats
OWASP published the API Security Top 10 to inform organizations about security issues affecting APIs. Below we present a brief overview of the top 10 API risks.
Learn more about these risks in our detailed guide to the OWASP API Top 10.
Object-Level Authorization Failures
APIs often expose endpoints handling object identifiers, widening the attack surface. Object-level authorization should apply to all functions that access data sources using user input.
To prevent broken object-level authorization:
Implement a system to detect and remediate broken object-level authorization.
Use strong authorization mechanisms.
Use API gateways.
Use threat modeling to evaluate authorization policies.
User Authentication Failures
Attackers often exploit incorrectly implemented authentication mechanisms to steal tokens and impersonate users.
To protect user authentication:
Use multi-factor authentication to verify user identity.
Block access after several login attempts.
Secure user credentials.
Use robust API keys.
Apply the ASVS requirements to the authentication system.
Data Exposures
Developers often expose too much data, assuming the client will filter the data before presenting it to users.
To prevent data exposure:
Use a proactive, shift-left security approach to build secure APIs.
Don’t rely on clients to filter data.
Minimize back end responses.
Insufficient Resources and Rate-Limiting
APIs often fail to impose restrictions on resource requests, enabling DoS and brute force attacks.
To mitigate these flaws:
Evaluate the API design and ensure it has the proper rate-limiting controls.
Refer to OWASP’s Automated Threat Handbook to understand the bots consuming your computing resources.
Function-Level Authorization Failures
An overly complex access control system increases the risk of policy misconfigurations and authorization failures. Attackers exploit these flaws to access user resources and admin functions.
To prevent broken function-level authorization:
Ensure the access control policies are clear, outlining who can access what.
Ensure everyone knows their responsibilities.
Audit the access control system regularly.
Mass Assignment
Mass assignment often results from unfiltered, client-supplied data bound to data models. Attackers can guess object properties or read documentation to edit properties.
To prevent mass assignment:
Use penetration tests to identify vulnerabilities.
Don’t directly map client data to internal variables.
Use an allow list for object properties.
Security Misconfigurations
Security misconfigurations often result from default or incomplete configurations.
To prevent security misconfigurations:
Periodically audit the system for misconfigurations.
Avoiding relying on defaults.
Use scanning and testing tools to check the application stack.
Don’t include sensitive information in error messages.
Injection Vulnerabilities
These vulnerabilities include SQL, NoSQL, and command injection flaws. Attackers send malicious data to an interpreter that executes unauthorized commands or exposes sensitive data.
To prevent injection attacks:
Validate inputs using an allow list.
Process incoming API requests with parameterized interfaces.
Restrict record returns by reviewing the filtering logic.
Asset Mismanagement
APIs often expose more endpoint devices than web apps, so it’s essential to maintain proper documentation.
To ensure proper asset management:
Maintain an inventory of all APIs.
Review all APIs for security.
Standardize API functions.
Prioritize APIs according to risk level.
Insufficient Monitoring and Logging
Combined with incident response, monitoring and logging allow organizations to detect and block attackers. Without proper monitoring, attackers can persist, causing damage undetected.
To ensure sufficient monitoring and logging:
Use a standard logging format for all APIs.
Monitor every API endpoint throughout its lifecycle.
OWASP Top 10 Mobile Security Risks
Below we present a brief overview of the top 10 risks facing mobile applications.
Learn more about these risks in our detailed guide to the OWASP Mobile Top 10.
Misuse of Platforms
Misusing the Android or iOS platform is the greatest security vulnerability for mobile devices. Apps can unintentionally misuse platforms.
To address this vulnerability:
Follow the platform’s security guidelines.
Utilize the server-side security features available.
Use secure configurations and coding practices.
Harden the server-side.
Limit data transmission between applications.
Limit file access permissions.
Encrypted stored data.
Insecurely Stored Data
Insecure data storage allows attackers to exploit stolen mobile devices and steal sensitive information. Sometimes, it is unavoidable to have applications store sensitive data, but it is essential to ensure this data is not accessible to unauthorized users. Encryption alone is not always enough.
To secure stored data:
Encrypt all data.
Use authorization and authentication mechanisms for accessing mobile apps.
Restrict mobile app access to stored files.
Use secure coding practices.
Communication Flaws
Insecure communication allows attackers to intercept data as it traverses the Internet.
To ensure secure communication:
Use SSL/TLS certificates.
Avoid untrusted and unsigned certificates.
Use strong encryption protocols.
Send sensitive data to the back end.
Avoid sending session IDs with SSL tokens.
Protect transmission channels with SSL/TLS.
Authentication Failures
Mobile devices often allow users to log in with default credentials when they fail to recognize users correctly, allowing malicious actors to bypass authentication measures.
To ensure secure authentication:
Use the right authentication mechanisms and security protocols.
Deploy authentication on the server-side.
Avoid storing credentials on mobile devices.
Encrypt local storage with strong keys.
Avoid “remember me” options.
Provide warnings when users opt for “remember me” options.
Use device-based authentication to prevent users from accessing data from other devices.
Implement binary attack protections.
Cryptography Flaws
Attackers exploit cryptography flaws to access sensitive data. It is usually easy to exploit weak encryption mechanisms on mobile devices.
To ensure sufficient cryptography:
Don’t store data on mobile devices.
Use robust cryptography algorithms.
Authorization Failures
Attackers exploit insufficient authorization measures and IDOR vulnerabilities to access sensitive data and escalate privileges. If an app’s authorization is incomplete, it might grant user permissions without sufficient verification.
To prevent insecure authorization:
Avoid granting roles and permissions via mobile devices.
Verify each identity independently through the back end code.
Client-Side Code Quality Issues
Poor coding practices can result in poor and inconsistent code quality. While client code issues are harder for attackers to detect, they pose a significant risk if discovered.
To protect client code quality:
Implement safe and consistent coding practices.
Use static code analysis.
Refrain from simple logic.
Integrate with reliable libraries.
List all third-party libraries to patch and update components.
Use automated tools to test memory leaks and buffer overflow.
Flag permissions on the content provider to block unauthorized access.
Tampering Risks
Counterfeit mobile apps with tampered code are often available on app stores. For instance, attackers may modify an application’s binary to install a backdoor.
To address code tampering risks:
Look for test keys, known APKs, and OTA certificates.
Check if the build is official using the build.prop element.
Look for SU binaries and try to use direct SU commands.
Test-run the SU command to check the current user ID.
Allow the mobile app to identify and react to code integration.
Use anti-tampering techniques like validation, code hardening, checksum, and digital signatures.
Reverse Engineering Vulnerabilities
Attackers often reverse engineer and decompile applications to analyze code and insert malicious functionality. Reverse engineering allows attackers to understand how an app works and exploit its weaknesses.
To minimize reverse engineering:
Check if an attacker can decompile the application using debugging tools.
Use robust obfuscation, including for metadata.
Build the app with C or C++ to secure runtime changes.
Segment the source code to control the app’s code flow.
Use binary packaging to prevent decompilation.
Implement anti-debugging mechanisms.
Redundant Functionality
Hackers can exploit many applications with redundant functionality to reach the back end. Some functions allow users to execute a privileged action anonymously.
To address this vulnerability:
Manually review the code before releasing it to production.
Analyze API endpoints and check logs and files to verify that attackers cannot exploit hidden functionality.
Check app configurations for hidden switches.
Verify that API endpoints and log statements are not publicly available.
Check if the log contains information about privileged accounts or back end processes.
Preventing OWASP Vulnerabilities with Bright Security
Bright Security is a developer-first Dynamic Application Security Testing (DAST) scanner that can test your applications and APIs (SOAP, REST, GraphQL), enabling you to bake security testing into your development and CI/CD pipelines.
Detect the OWASP Top 10 for web applications and APIs, MITRE 25 and more, including Business Logic Vulnerabilities. You can easily reduce your security and technical debt by scanning early and often, on every build, to be secure by design.
With NO false positives, there is no need for manual validation of security findings, removing costly and time consuming human bottlenecks that cripple your rapid releases and drain your security team’s limited resources.
See Additional Guides on Key Application Security Topics
Together with our content partners, we have authored in-depth guides on several other topics that can also be useful as you explore the world of application security.